Making a Commission - Part 4 - Heat Treatment
After the basic grind comes the most critical step in the manufacture – steel heat treatment.
It consists of two phases – quenching and tempering – and it gives strength and hardness to initially soft and malleable steel. And how it is done depends on the used steel, since not all steels are created equal.
These kitchen knives (like most of my knives) are being made from N690 steel from Böhler. This steel was developed specifically for manufacturing knives and from steels readily available to me it offers the best performance for its price. Strictly speaking, it is not completely "stainless" steel but is corrosion-resistant enough to not corrode due to ordinary use in the kitchen. It contains 1% of carbon, thus it can achieve high hardness, and it also contains a bit of cobalt and vanadium, thus it needs not to be cooled extremely fast during quenching, which does offer a slight advantage for small-scale manufacture. From experience and some tests, I know that the main thing is to heat it to 1030-1080°C and the quenching medium is not that important after that.
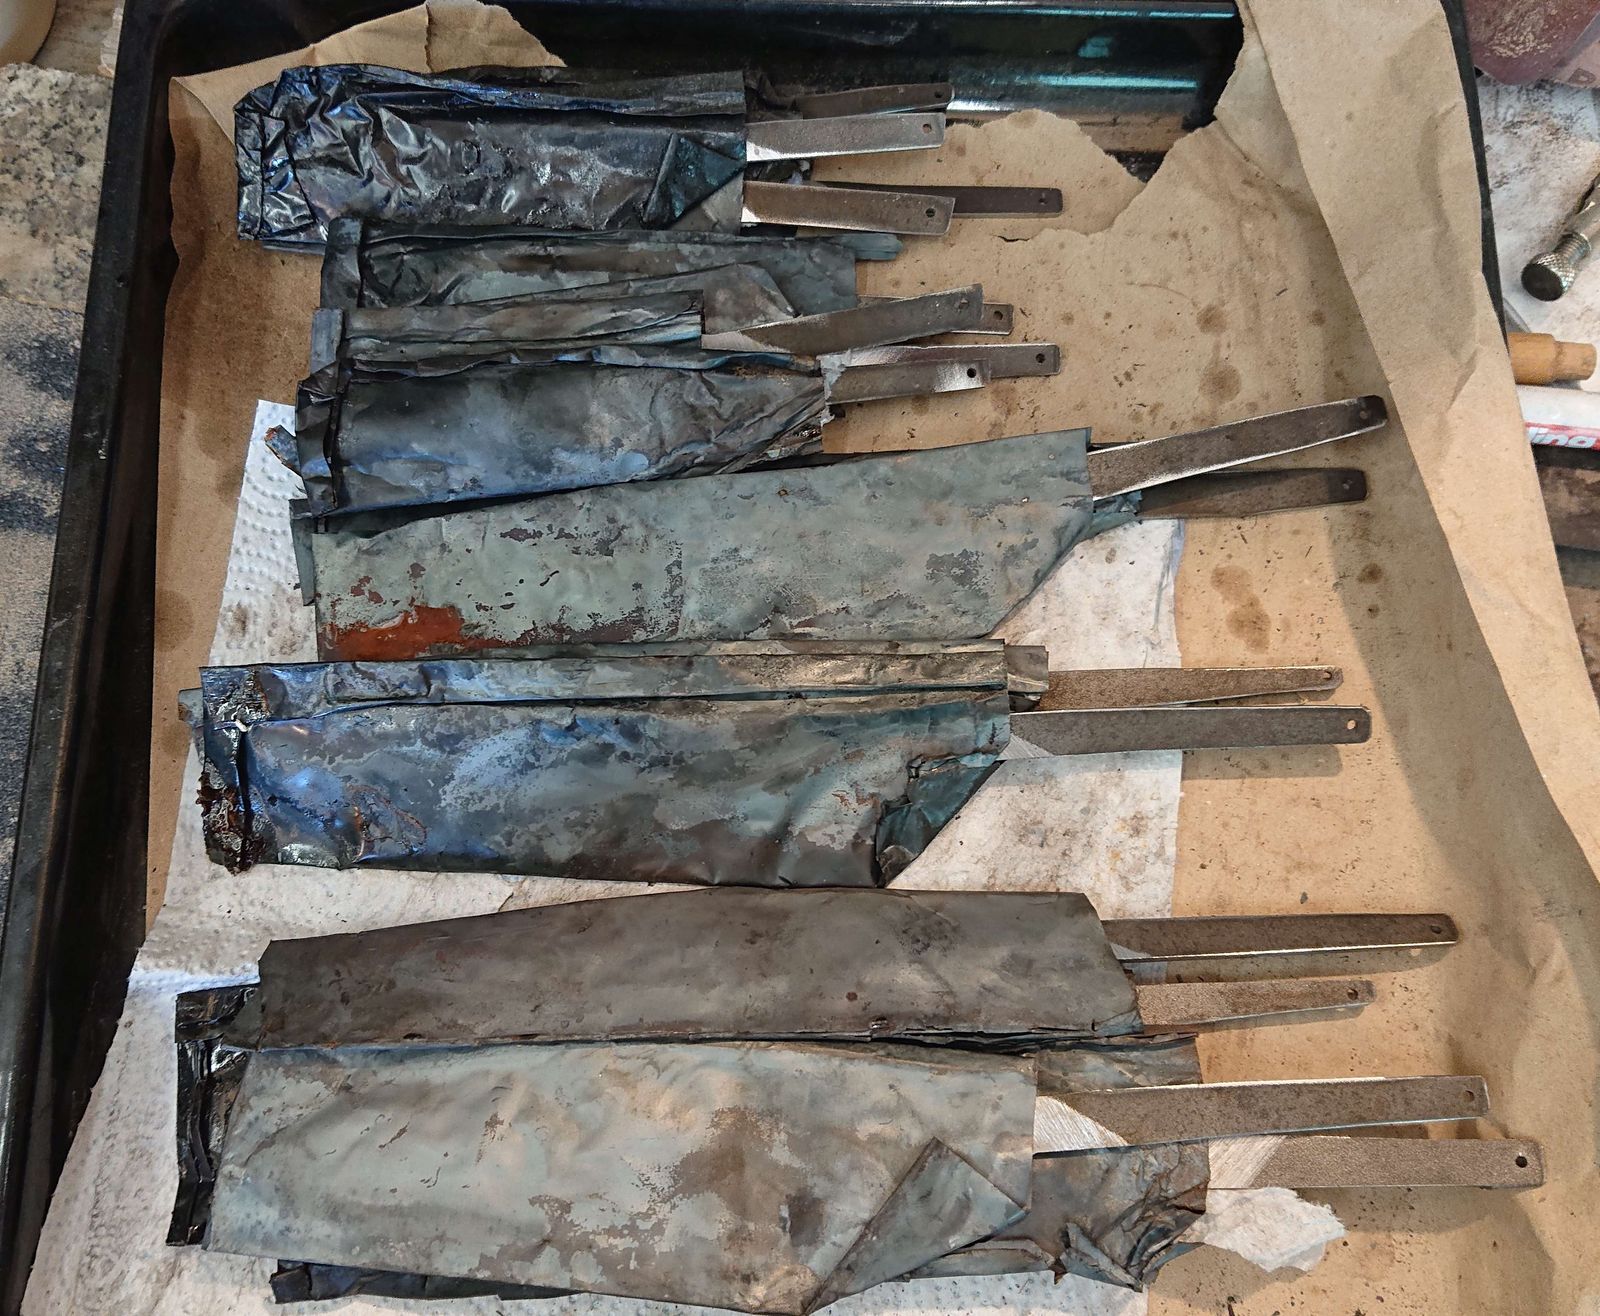
Hardening starts by wrapping the blades in quenching foil - a stainless steel foil. In the picture, it has greenish-black color because it was used already and is thus slightly burned (black is iron oxides, and green is chromium(II)oxide). It is possible to use it several times before it gets burned through and has to be discarded. The quenching foil has two functions. Firstly it prevents carbon loss which would happen rather quickly with steel this thin and at temperatures this high. Secondly, it prevents surface oxidation and scale build-up, which leads to material loss and wears down belts. And to secure an almost completely oxygen-free environment, I pack a tiny bit of paper with every blade – after it is inserted into the forge, it burns up fast and uses up the oxygen inside.
There is a significant time saving when quenching multiple blades. It takes about fifteen minutes to heat up the forge to the required temperature and the blade needs to be held at that temperature for approx fifteen minutes too. Thus when making a single blade, I would burn fuel for at least half an hour. When making multiple blades, I can insert and take them out at five-minute intervals. When there are three blades in the forge, I take out the one inserted as last (closest to the burner), quench it, and insert another in the forge behind the two remaining, etc. That can effectively reduce forge-time per blade below 10 min.
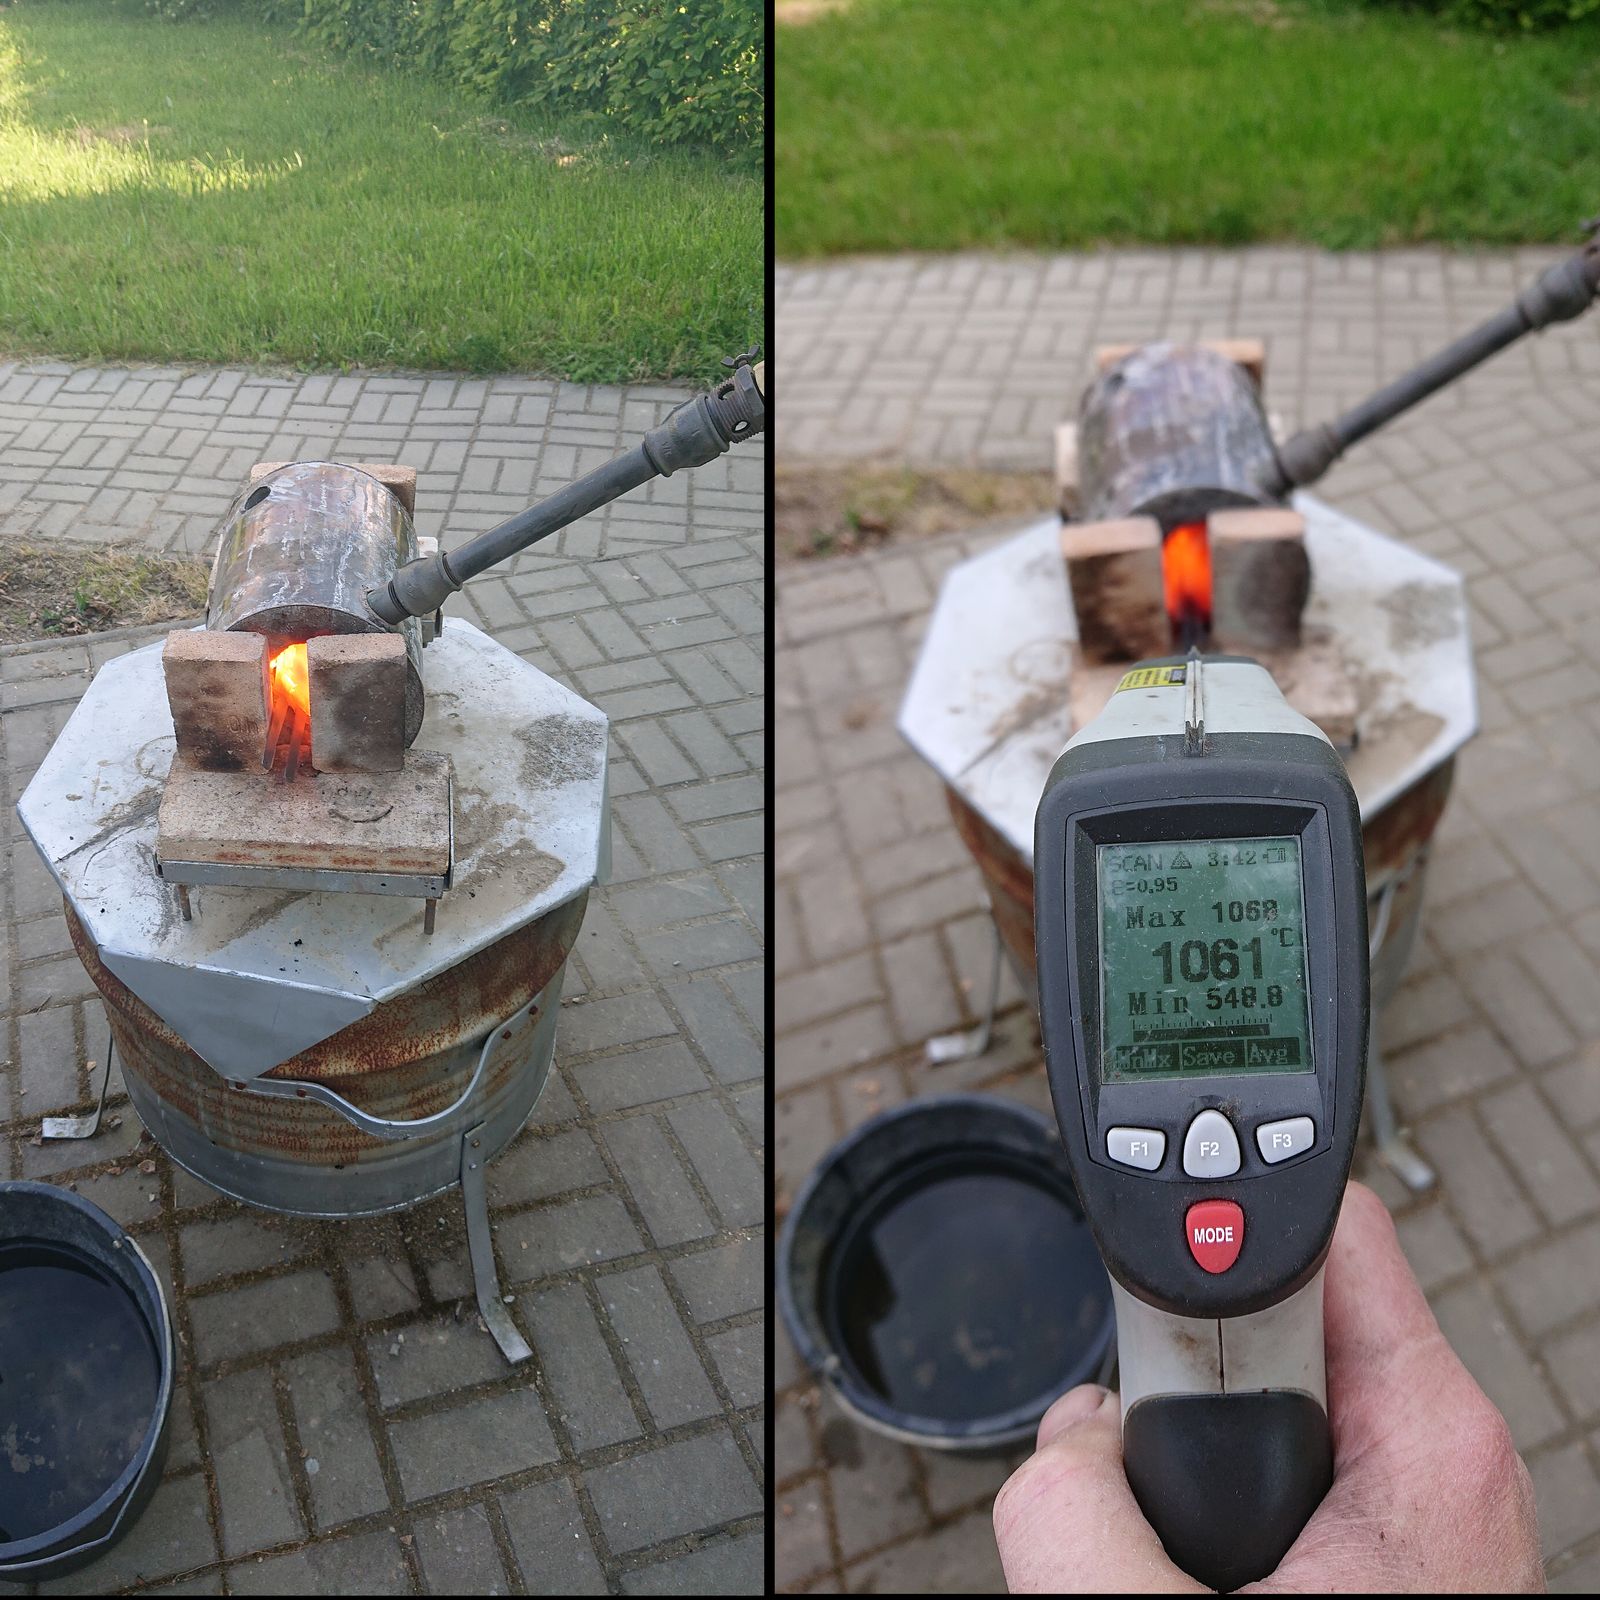
As I mentioned, it is necessary to reach a temperature in the 1030-1080°C range and then quench the blades by cooling them quickly. The steel manufacturer recommends oil as a quenching medium, and I am using it for blades thick 3 mm or more, however, oil is not necessary for blades as thin as these and in my experience, it is not ideal – and satisfactory results can be achieved by plate quenching.
Plate quenching cools the steel down by clamping it between two cold plates from highly thermo-conductive material instead of submerging it in liquid. Typically used material is aluminum and for occasional use it suffices to take two pieces of aluminum, put the hot blade between them, and clamp/weigh them down. However, since I am using this method often, I build myself specialized quenching pliers.
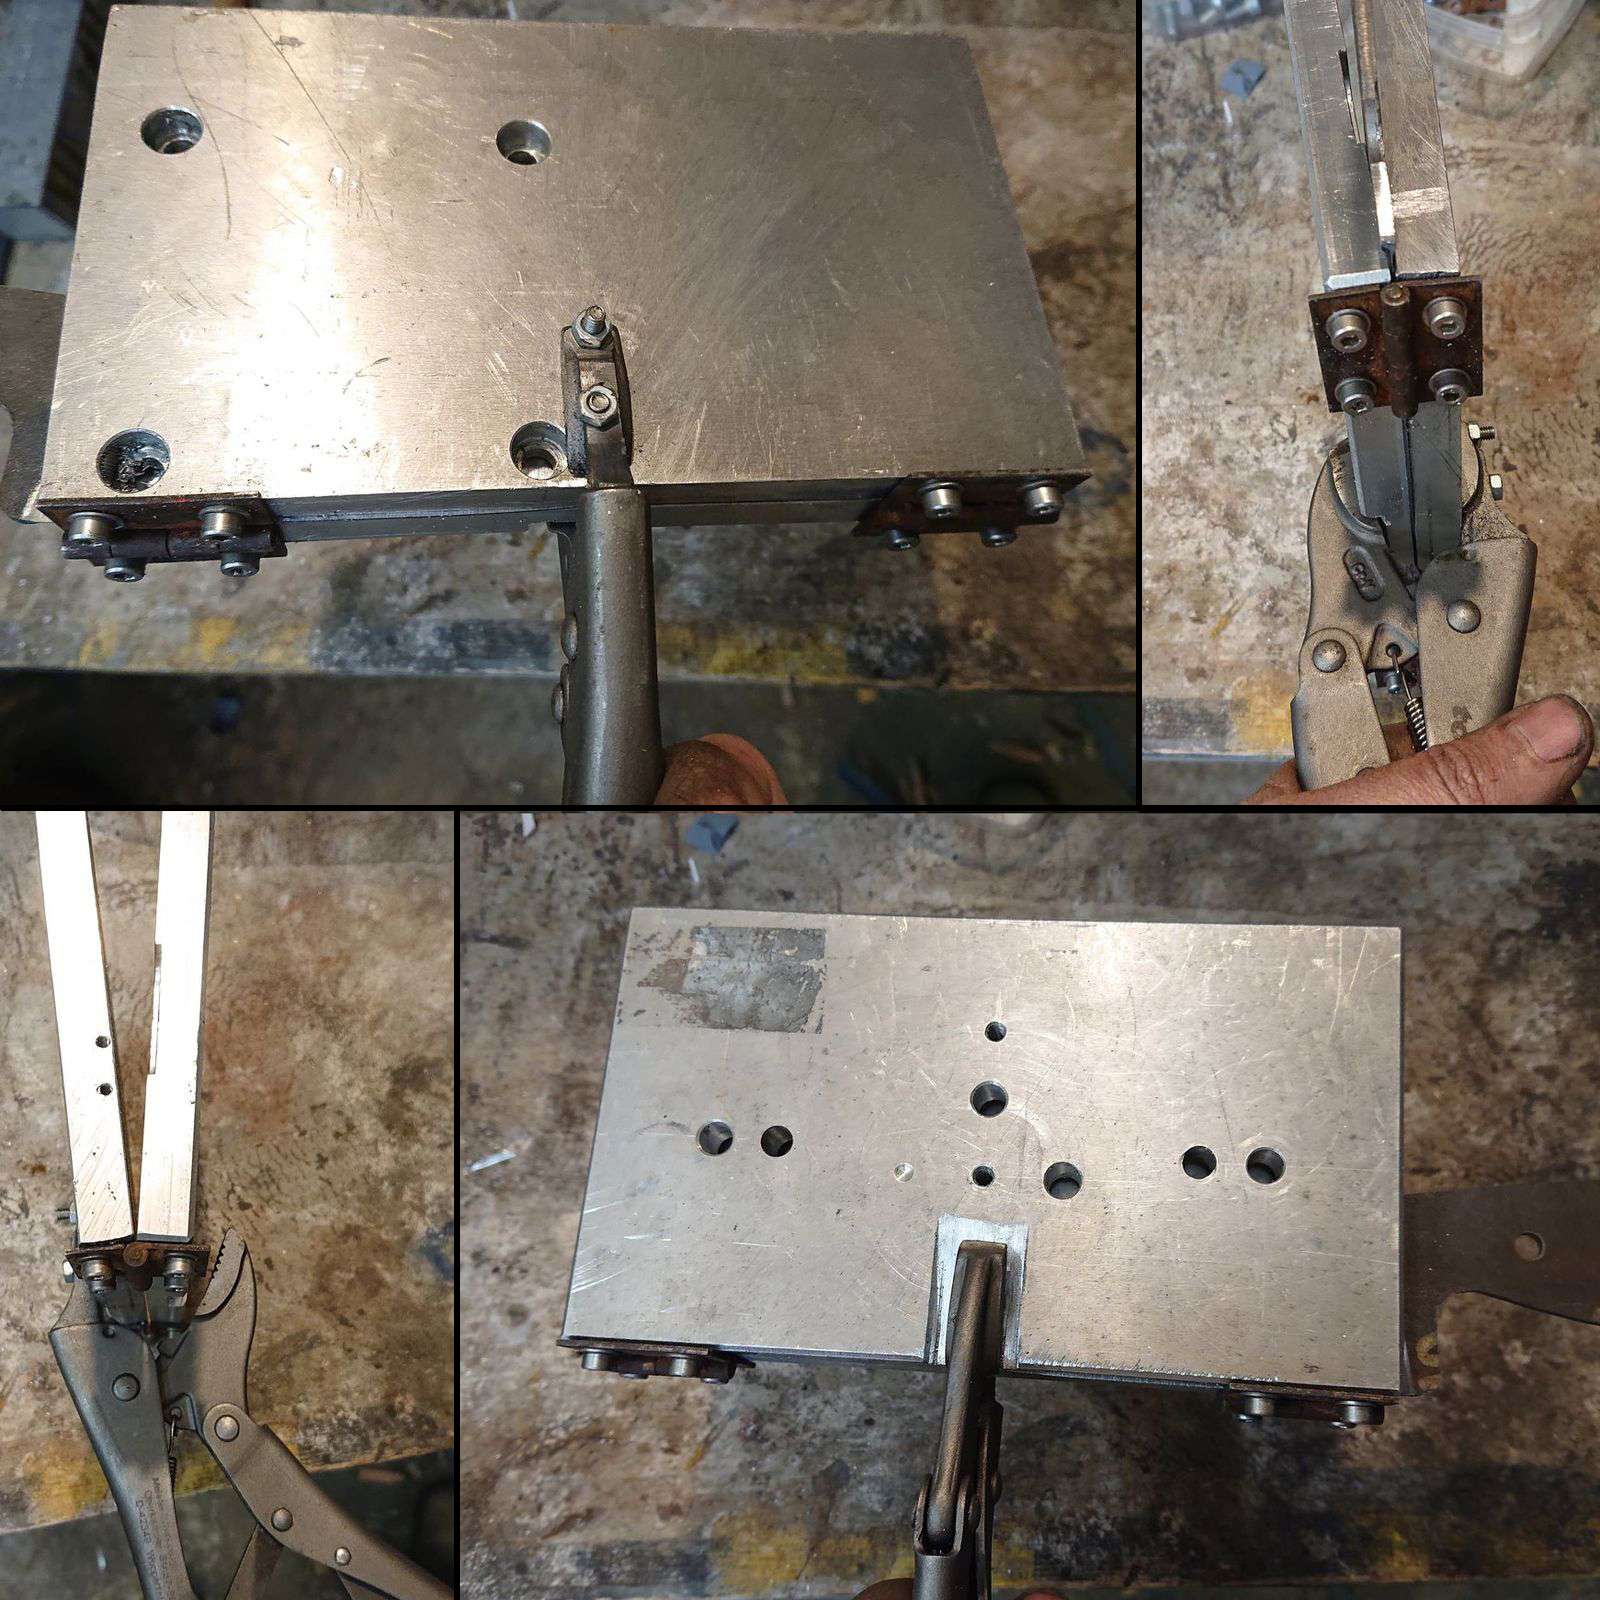
These are ordinary locking pliers to whose jaws I screwed two aluminum plates in a way that allows me to squeeze hot blades between them. The pliers allow me to work safely and quickly – I hold the quenching pliers in my left hand, and tongs in my right hand, I take the blade out of the forge, put it between the plates, close the pliers and it is done. After that I put the whole thing into a bucket of water, otherwise, the plates would heat up too much.
However even though there are no flames from hot oil or embers flying from the forge, I am doing all this work in non-flammable clothes and I wear a face shield. Temperature 1060°C does deserve some respect and caution.
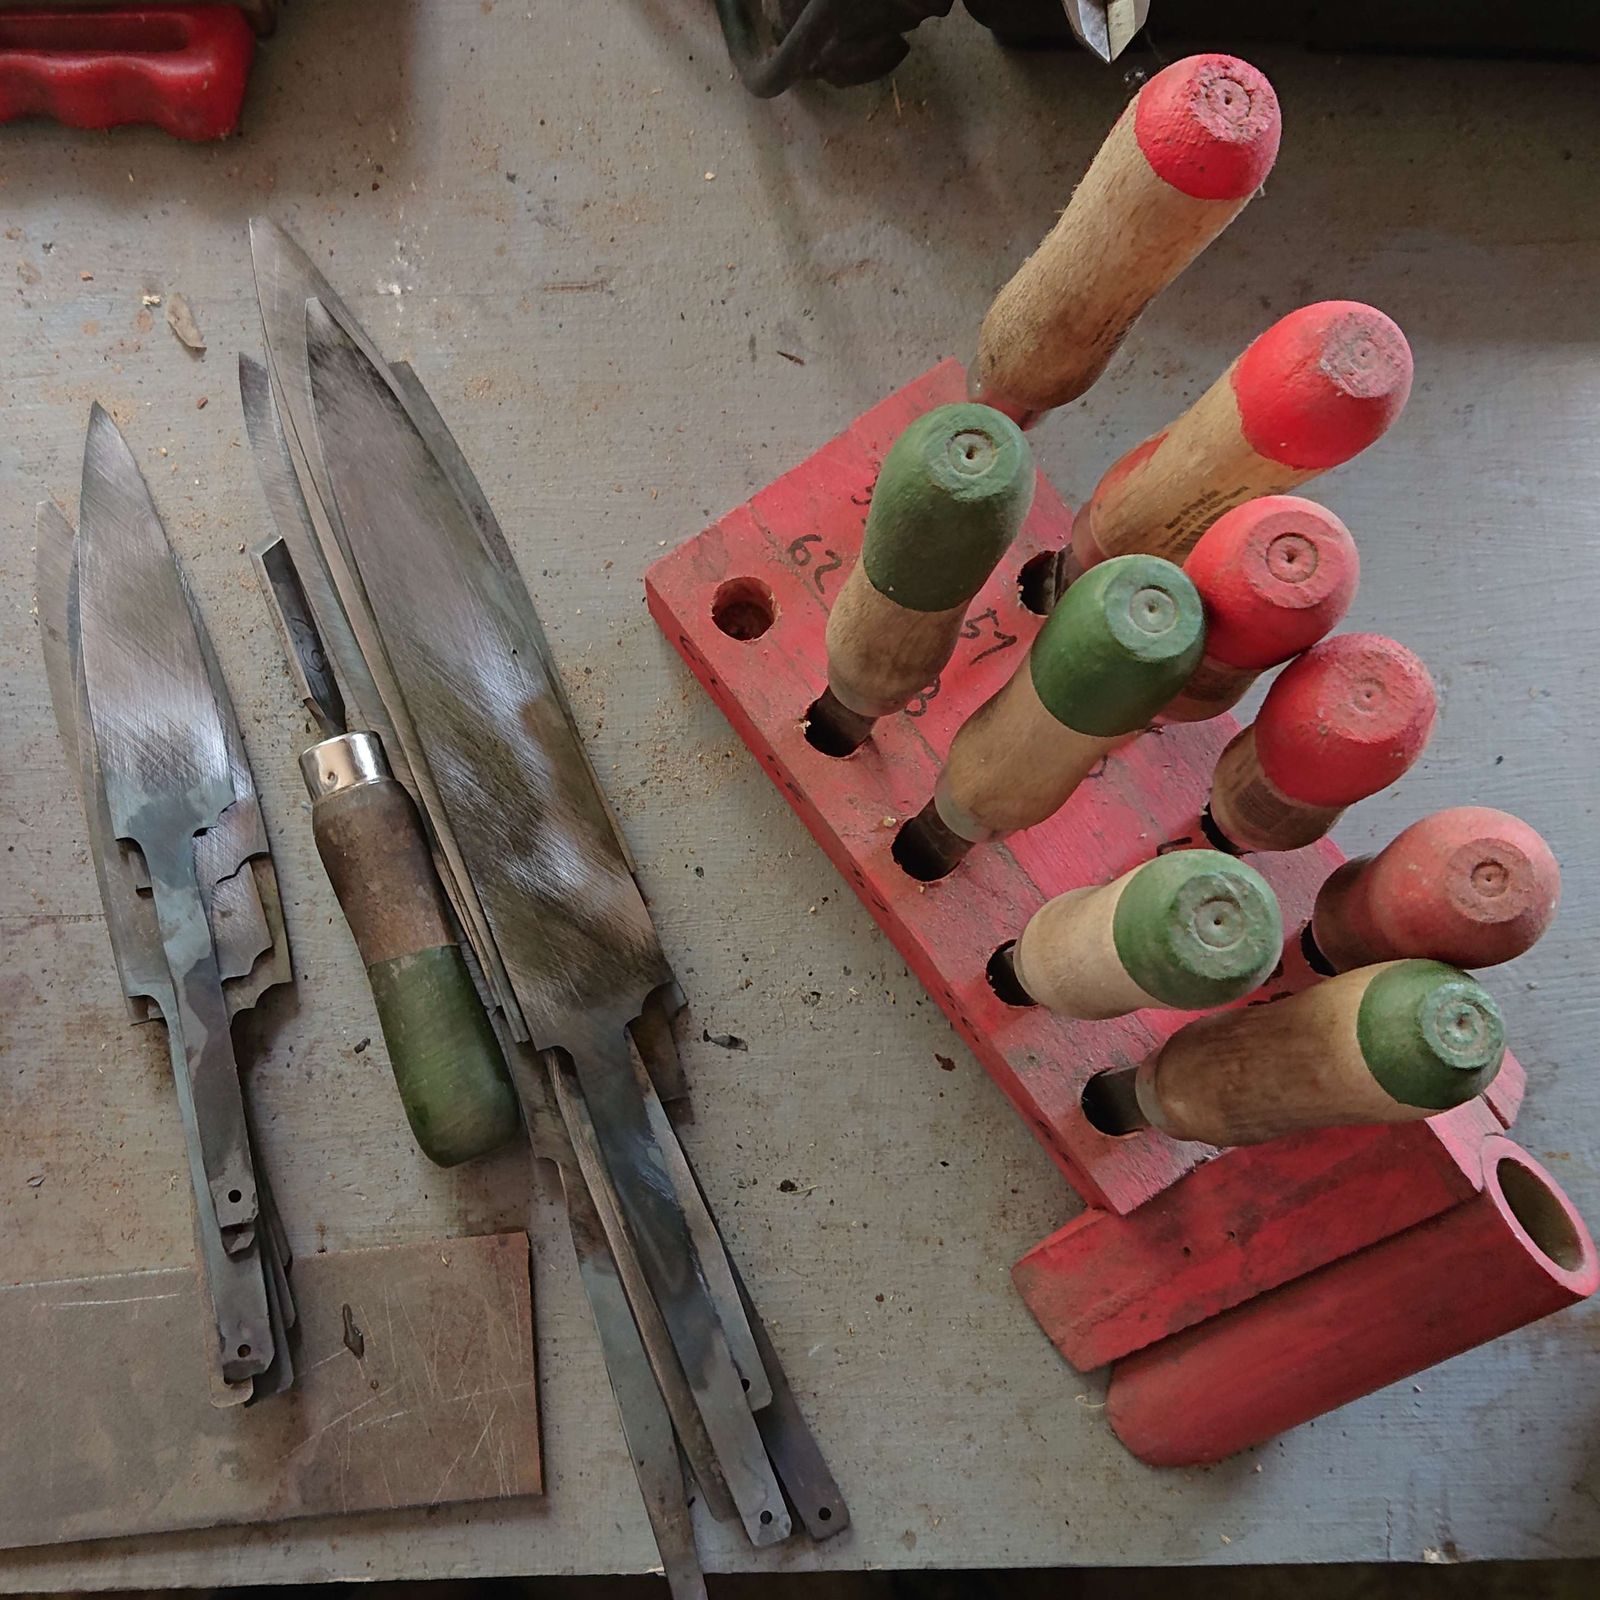
After I take the blade from the water, I clean one side of oxidation (the foil reduces it but it cannot prevent it completely) and I try to scratch it with a scraper with a known hardness of 62 HRC on its whole length. If the scraper leaves a mark, it is necessary to pack it up in foil again and repeat the quench because it was not heated up high/uniformly enough. This time I managed to quench all blades on the first try. But after the quench, I had to wait a few hours before I could temper them because I wanted to use lower-cost electricity for that. Thus I put all blades into the freezer at -20°C. It probably does not have any effect (and if it does, it is minuscule), but it won't hurt. Pity I cannot get my hands on dry ice around here – cooling them to -80° would be beneficial for hardness.
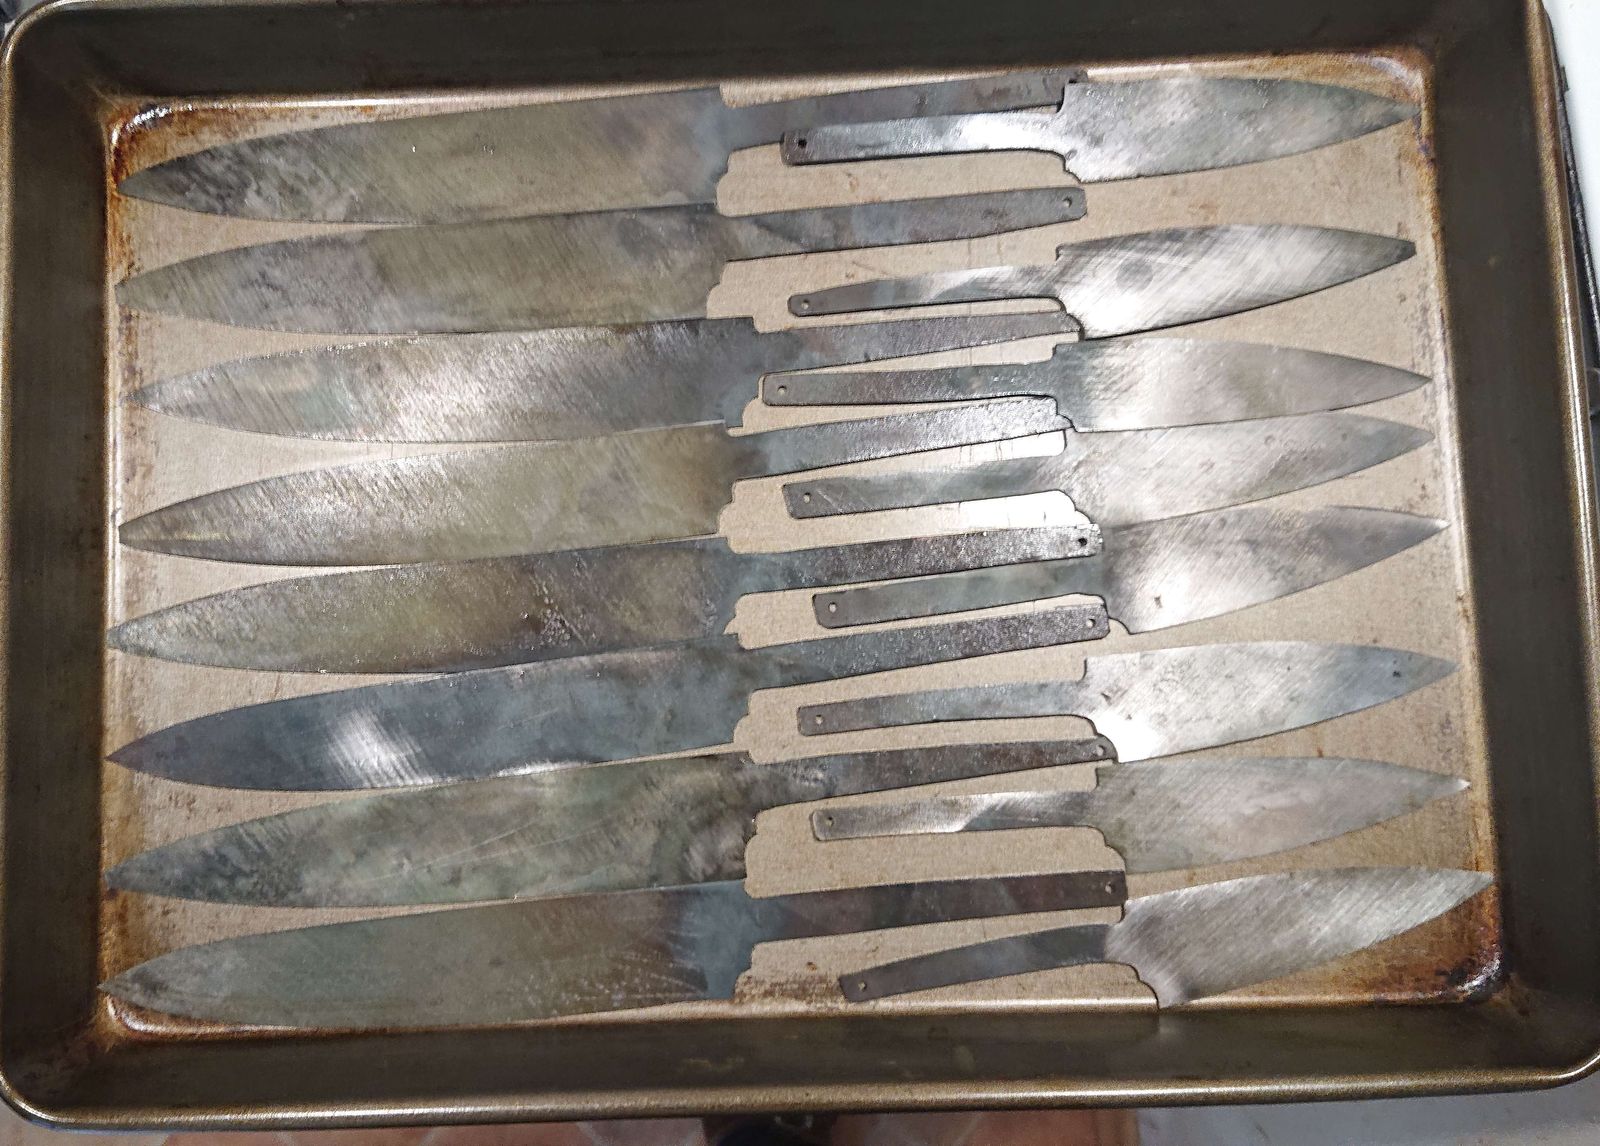
When the lower-tariff electricity is active, I can put all blades into a baking tray and heat them in our kitchen oven for half an hour at 150°C. After that I take them out, let them cool down to room temperature and then I heat them again for another half-hour at 150°C. Tempering lowers the hardness slightly, but it increases the toughness and strength significantly – freshly quenched blades are as brittle as glass. After tempering they are still hard enough (in fact, still over 62 HRC), but they are also stronger and springier, they do not break easily when, for example, they fall on the ground.
So far published four articles describe three-four working days. The next week's article will be shorter but it will describe the longest step in the manufacturing process. A step that took several weeks for these sixteen blades.
